HERCULES P32 DJ
SETUP
Drivers & Firmware
(Windows & Mac)
Download the drivers of the unit from Hercules Support Center and follow the provided instructions in order both drivers and firmware to be updated to the latest version.
https://support.hercules.com/en/product/p32dj-en/
VirtualDJ 8 Setup
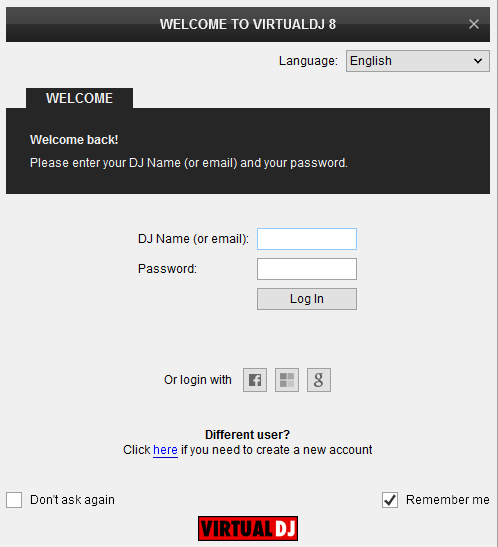
Once VirtualDJ 8 is launched, a Login Window will appear. Login with your virtualdj.com account credentials.
A Pro Infinity, a Pro Subscription or a PLUS License is required to use the Hercules P32 DJ. Without any of the above Licenses, the controller will operate for 10 minutes each time you restart VirtualDJ.
http://www.virtualdj.com/buy/index.html
Click on the Use Soundcard button to allow VirtualDJ to auto-create the pre-defined audio configuration.
Click to OK
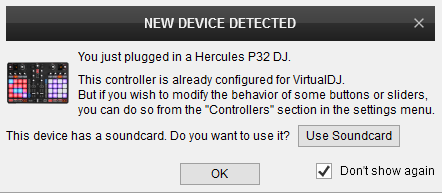
The unit is now ready to operate.
MIDI Operation.
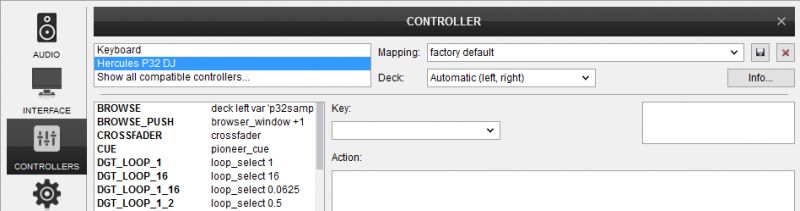
The unit should be visible in the CONTROLLERS tab of Config and the “factory default” available/selected from the Mappings drop-down list. The factory default Mapping offers the functions described in this Manual, however those can be adjusted to your needs via VDJ Script actions.
Find more details at http://www.virtualdj.com/wiki/VDJ8script.html
AUDIO Setup
The unit has a pre-defined Audio configuration and a special button in the AUDIO tab of Config to provide that. The default audio configuration requires speakers to be connected at the rear-side Mix Out RCA sockets and headphones at the right-side panel 1/4" socket.
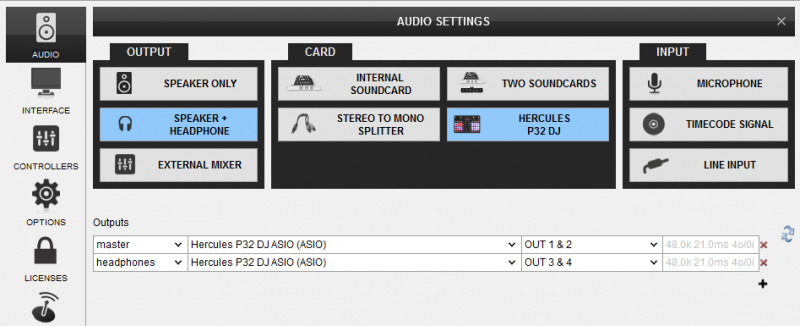
Refer to VirtualDJ 8 Manual for alternative audio configurations http://www.virtualdj.com/manuals/virtualdj8/settings/audiosetup.html
For further software settings please refer to the User Guide of VirtualDJ 8.
http://www.virtualdj.com/manuals/virtualdj8/index.html
CONTROLS
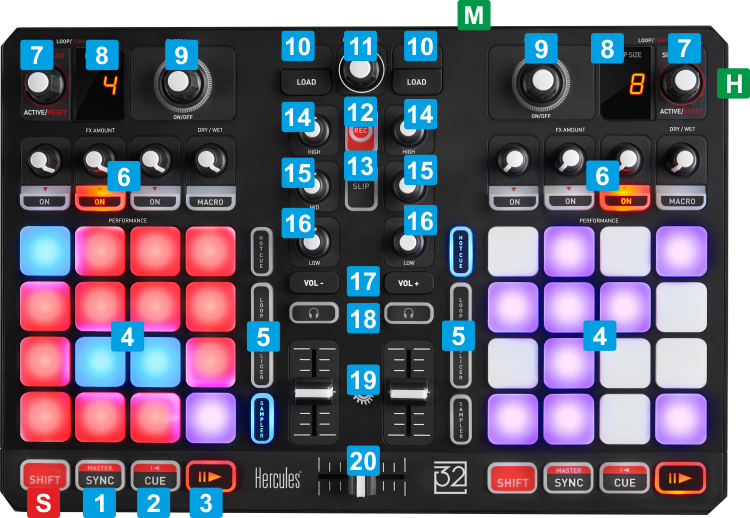
KEY
ACTION
SHIFT (SECONDARY) ACTION
Preview track when paused while button is pressed
Jumps and stops to the Cue point when playing[
Push to enable/disable the selected Loop
Push to turn off Filter (zero position).
Push the rotary to change the step to 1/100 of beat (for accurate track positions) and push again to set step back to 1 beat.
Hold this button down for more than 2 seconds to unload the same deck.
Hold the right SHIFT button down and then use the right LOAD button to cycle through the views of Sideview (Automix, Sidelist, Karaoke, Sampler and Clones)
Push to cycle focus through the Browser windows (Folders, Songs and Sideview).
When focus is on the Folders Browser window, push to open/close sub-folders.
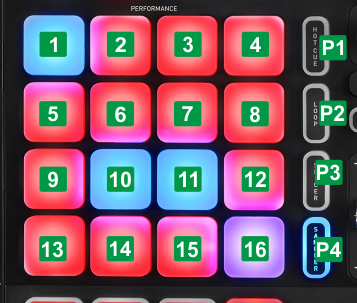
PADS
KEY
ACTION
SHIFT (SECONDARY) ACTION
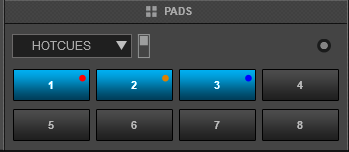
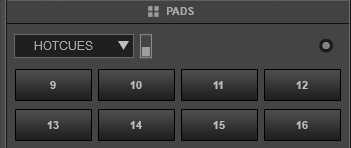
HOTCUE MODE
Press the HOTCUE mode button [P1] to set the Pads to Hotcue mode. The Hotcue Pads page will be also displayed on the GUI of VirtualDJ, reflecting the operation of the 8 top Pads. Hold SHIFT and then press the P1 button to toggle the view between Pads 1 to 8 and Pads 9 to 16
KEY
ACTION
SHIFT (SECONDARY) ACTION
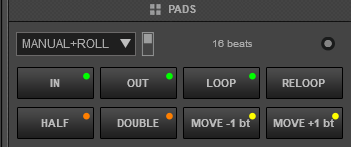
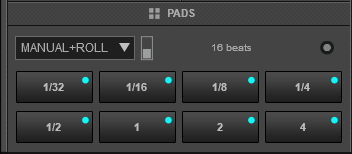
LOOP MODE
Press the LOOP mode button [P2] to set the 8 bottom Pads to Manual & Roll Loop mode. The Manual+Roll Pads page will be also displayed on the GUI of VirtualDJ, reflecting the operation of the 16 Pads. Hold SHIFT down and then press the P2 button to toggle the view between Pads 1 to 8 and Pads 9 to 16.
KEY
ACTION
SHIFT (SECONDARY) ACTION
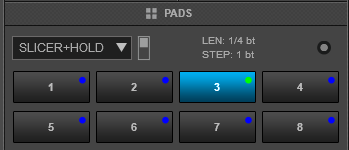
SLICER MODE
Press the SLICER mode button [P3] to set the 8 bottom Pads to Slicer mode. The Slicer+Hold Pads page will be also displayed on the GUI of VirtualDJ, reflecting the operation of the 16 Pads. Hold SHIFT and then press the P1 button to toggle the view between Pads 1 to 8 and Pads 9 to 16

KEY
ACTION
SHIFT (SECONDARY) ACTION
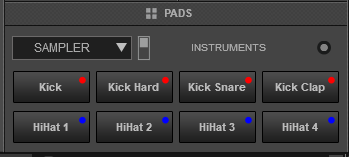
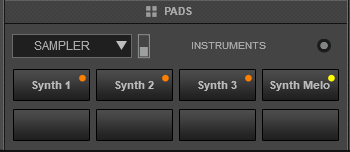
SAMPLER MODE
Press the SAMPLER mode button [P4] to set the 16 Pads to Sampler mode. The Sampler Pads page will be also displayed on the GUI of VirtualDJ, reflecting the operation of the 16 Pads. Hold SHIFT and then press the P1 button to toggle the view between Pads 1 to 8 and Pads 9 to 16
KEY
ACTION
SHIFT (SECONDARY) ACTION
*Note: If the selected Sampler Bank has less than 17 samples, both sides of the Pads will trigger the same samples. If the selected Sampler Bank has more than 16 samples, the left side Pads will trigger Samples 1 to 16 and the right side Pads will trigger Samples 17 to 32.
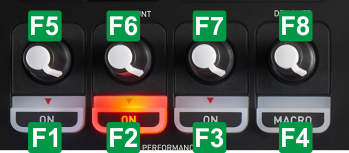
EFFECTS
KEY
ACTION
SHIFT (SECONDARY) ACTION
Trigger the selected Effect
In Multi FX mode
Trigger the selected Effect of the 1st FX Slot.
Triggers the 1st FX Button of the selected Effect (not all Effects have Effect Buttons)
In Multi FX mode:
Selects the next available Effect for FX Slot 1
Selects the previous available Effect
In Multi FX mode
Trigger the selected Effect of the 2nd FX Slot.
Triggers the 2nd FX Button of the selected Effect (not all Effects have Effect Buttons)
In Multi FX mode:
Selects the next available Effect for FX Slot 2
Selects the next available Effect
In Multi FX mode
Trigger the selected Effect of the 3rd FX Slot.
Opens/Closes the FX GUI of the selected Effect at the Browser.
In Multi FX mode:
Selects the next available Effect for FX Slot 3
Adjust the 1st Parameter of the selected Effect
In Multi FX mode
Adjust the 1st Parameter of the selected Effect of FX Slot 1
Adjusts the 4th Parameter of the selected Effect (if available)
In Multi FX mode:
Adjusts the 2nd Parameter of the selected Effect for FX Slot 1
Adjust the 2nd Parameter of the selected Effect
In Multi FX mode
Adjust the 1st Parameter of the selected Effect of FX Slot 2
Adjusts the 5th Parameter of the selected Effect (if available)
In Multi FX mode:
Adjusts the 2nd Parameter of the selected Effect for FX Slot 2
Adjust the 3rd Parameter of the selected Effect
In Multi FX mode
Adjust the 1st Parameter of the selected Effect of FX Slot 3
Adjusts the 6th Parameter of the selected Effect (if available)
In Multi FX mode:
Adjusts the 2nd Parameter of the selected Effect for FX Slot 3
